
Laws of lighting in drawing
Laws of lighting in drawing part 3: Why many complicated forms make up simple ones, summary
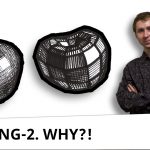
- The form of some objects, which at first seems to be complex, can be easily understood if you notice that it consists of simple geometric forms: sphere, cylinder, cone, pyramid, cube, parallelepiped (brick), or tor (donut).
- Knowing that, it’s easy to understand why the shading on the object is precisely this way and not different: actually, it’s the shading of simple forms and transitions between them.
- Thinking about the angle of the surface area towards the light source allows you to understand why it has such lighting and what will happen if you move the light source or the object.
- That’s why after some training in drawing the basic forms, you’ll have a strong skill in drawing the right lighting. For example, in my time as a student, my teacher gave us the task of drawing match boxes and cubes 10-20 times in various positions, 3-4 balls, as well as some other forms. The lighting on the flat surface can be understood by the folded pleats in paper and rectangular kitchen boards (turned towards the light source at different angles), and with simple origami figures too.
- However, you need to remember that not all complex figures can be easily divided into basic forms. The clear example is the human body, where you can’t achieve much with the bare eye. There is a risk of simplifying the form too much, or, by simply eye-copying the forms, to “break” the feeling of the form in a drawing.
Additional info
2* You already know why simple objects are lighter (from the previous lesson). That’s why it’s easy to depict lighting not only on a simple object, but also on a complex one, even without looking at it (using your imagination). Or you can draw lighting from another place than what you see. Moreover, if you understand the construction of the object, it’s possible to imagine inside how it will look if you rotate it and draw it from a different position.
3* Because the lighting of the basic forms can be explained by the set of flat surfaces, dividing complex objects into simple objects is just a trick to simplify the task into something you already know how to do. Think it over from the start, beginning with the flat surfaces and without using the basic forms. Plus, you shouldn’t forget that in real life there are several light sources, and I’ll shoot a separate lesson about that, but the idea is that their lights “sum up”. Also, surrounding objects can block the path of the light or reflect it.
4* The task with wooden kitchen boards is not so simple if they have a handle with a hole. The idea is that it’s one of the first real life objects which you will be able to draw consciously. You need to take into account perspective, and you must understand that even simple objects have thickness, and understand the lighting. But it’s much more interesting to draw this object than some abstract forms.
5* Here you need to switch from observing the surface of the object to researching its construction, literally: you need to understand which parts the object does not consist of to be able to depict its appearance convincingly. That means that you can try to simply copy shadows and light, but due to the lack of consciousness, the light and shadow will not be depicted precisely. Secondly, the artist will not highlight or diminish some areas which due to the limited nature of drawing material will lead to the situation where for a trained eye the artwork looks “dead”, “unconvincing”. Moreover, it will be hard to depict the objects so that they correspond with the idea of a work of art, because the artist will be bound to the lighting and angles that he observes in nature.
Next lesson, how to understand shading on objects with many small details
Previous lesson, how and why forms have shading
Additional materials
*This is a test version of the materials. I’ll need to make plaster forms and shoot it better, but you already can grasp the idea. However, the forms in the images let the light through a bit (see the white space on the corner in the shadow of the cube in the first image), and this is bad.

Let’s move the lamp in a vertical plane, above the cube.


Now we will move it in a horizontal plane.

Notice how abruptly the upper side gets darker if I lower the lamp. At the same time, the light on the prominent surface on the top of the cube will stay on the side directed towards the lamp. However, it will get darker too.

The lamp is almost lighting the face of cube, so the difference in the lighting of the sides is almost indiscernible:

But if I shift the lamp a bit, it appears:

Now we will move the lamp behind the cube:

Notice how a small change in the height of the lamp changes the length of the cast shadow:


*To understand the shape of a shadow, you just need to remember that it arises from blocking the light with the object and that the light moves in straight lines.

Prism

Let’s move the lamp in a vertical plane:


Now the lamp is in a horizontal plane. Please notice that the side directed towards the light source is the lightest.


In the next photo you can see that the light on the prism is a bit lighter than the paper on the table, however they are made from the same material. This difference is due to the angle of the direction of the light source.

Now we will place the lamp behind the prism:

Cylinder
Let’s move the lamp in a vertical plane:


Now the lamp is moving in a horizontal plane:

The upper side of the cylinder is slightly concave because I made it from paper. Notice that the part of the “curved part” which is directed towards the lamp is lightest, and the part that is turned away is in shadow. Again, this is due to the angle of the direction of the light.


Now we will move the lamp behind the cylinder. Notice that it isn’t clear from just looking at the lamp where it’s located in space. But by looking at the displacement of the core shadow and the cast shadow you can understand where it is in no time.


Sphere


In front of the sphere:


That is how it works. In short, at first it seems that shadowing on objects happens randomly and is complex, but you can understand this quite quickly and then easily draw it from mere imagination.

